Hard Surfaces and Transitions
Master the art of seamless transitions between tile, stone, and metal surfaces. Learn proven edge treatments and compatibility techniques that work in real Hong Kong homes.
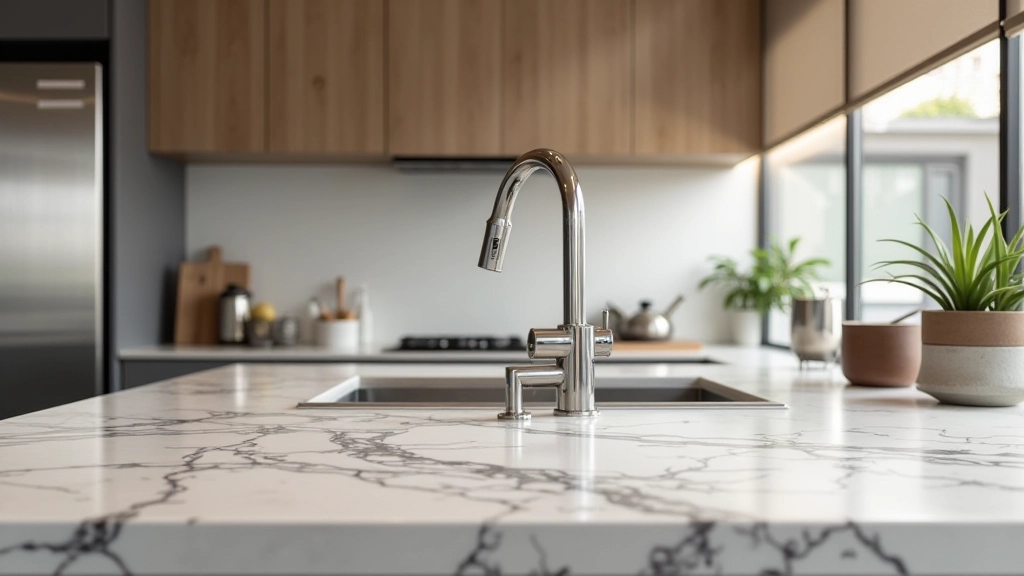
When you're planning a renovation in Mong Kok or anywhere in Hong Kong, the materials you choose matter — but here's what really matters more: how those materials meet each other. We're talking about the transition between your kitchen tile and the stone countertop, where the backsplash meets stainless steel, where your bathroom floor transitions to wall cladding. These transitions aren't afterthoughts. They're the difference between a polished, professional finish and a space that feels rushed.
Why Transitions Matter More Than You Think
Hard surfaces expand and contract with temperature and humidity. That's just physics. In Hong Kong's climate — hot, humid summers and cooler winters — your materials are constantly moving. If you don't account for this when planning transitions, you'll get visible gaps, cracked grout, or worse, water damage creeping behind your beautiful new finishes.
The transitions also define the visual flow of your space. A poorly executed edge between materials breaks the eye. It feels amateur. A well-planned transition? It guides your eye naturally and makes the entire room feel intentional.
Think about the last kitchen you walked into that felt expensive. Wasn't it partly because everything connected smoothly? Because materials flowed into each other without jarring visual stops?
Edge Treatments: Your First Decision
Pro tip: The edge treatment you choose determines how your materials age. A cheap plastic trim might work for 3 years. A proper metal trim? It'll outlast the materials it's protecting.
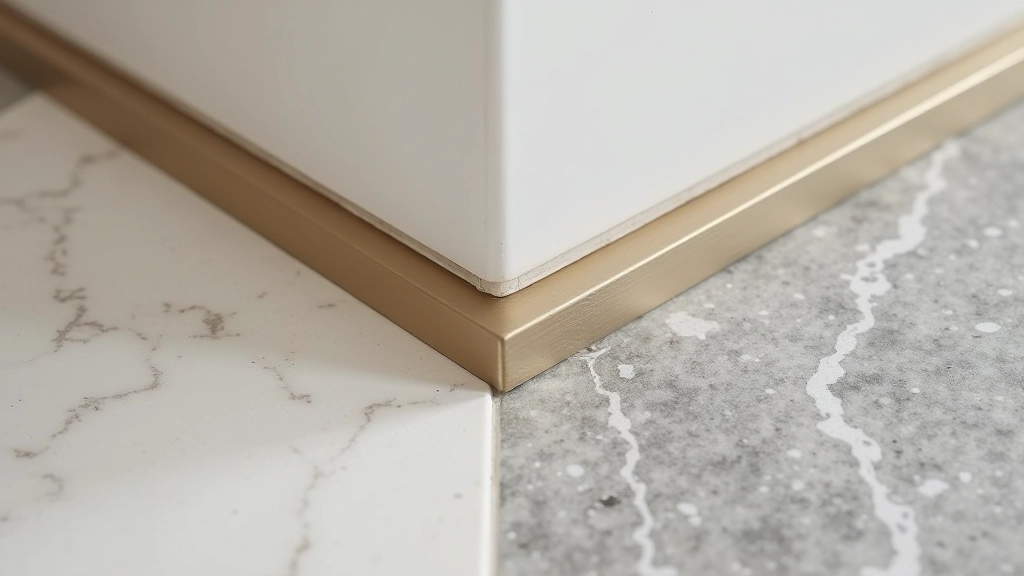
Metal Trim (Aluminum or Stainless)
This is the standard in Hong Kong renovations. Stainless steel trim won't rust in humid conditions. It's professional, it's durable, and it costs between HK$80-150 per meter installed. Works with tile, stone, or engineered surfaces. The trim hides the raw edge and gives a finished look.
Stone Bullnose
For natural stone countertops, you can have the edge itself shaped. It's more expensive upfront — maybe HK$120-200 per meter — but it looks seamless. No trim to tarnish. The entire edge is the same material, so it weathers uniformly. Popular for granite and marble.
Beveled Edge
A 45-degree angle cut on the edge of your material. Catches light nicely, looks deliberate. Works well with tiles and some engineered stone. Requires precise installation to avoid chipping. Cost-effective but demands a skilled installer.
Eased Edge
A subtle rounded edge. Safe and practical. You won't cut yourself on sharp corners. It's the safest choice for homes with kids or elderly residents. Works with most materials and hides minor imperfections in the stone.
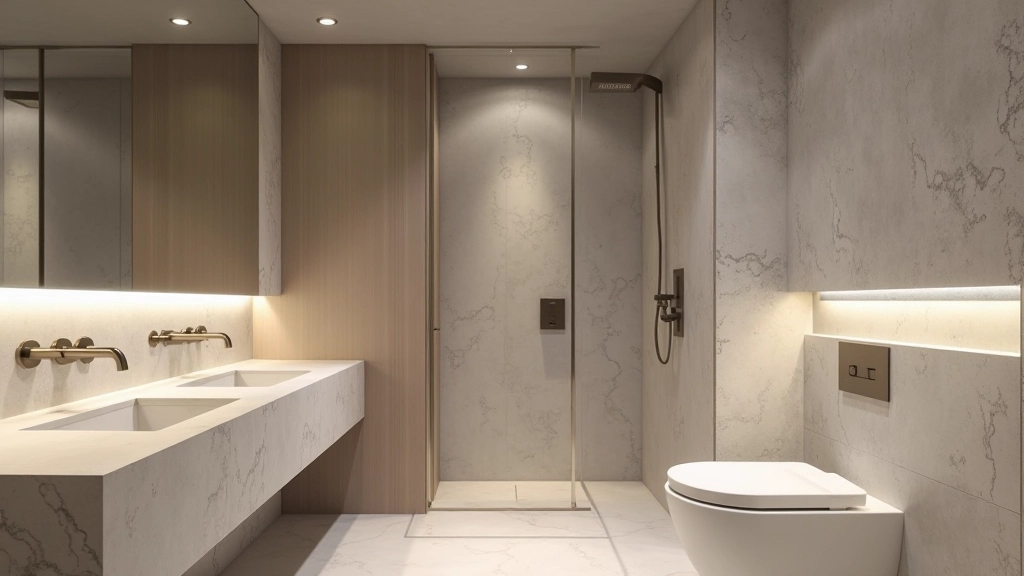
Which Surfaces Work Together?
Not every hard surface likes every other hard surface. Porcelain tile and granite? Great together. They have similar expansion rates and won't conflict. Marble and tile? You need to be careful. Marble is softer, more porous, and expands differently. If they're touching directly without proper planning, you'll get visible movement.
Stainless steel is forgiving — it works with almost everything. That's why it's so common in modern Hong Kong kitchens. But steel and natural stone need a transition material between them, usually a metal trim or a grout line that's slightly flexible.
Here's what we recommend: when you're combining more than two materials (say, tile, stone, and steel), create visual breaks between them. Don't try to make them all flow into one another. A small metal trim or a shadow gap between materials actually looks more intentional than trying to force them together.
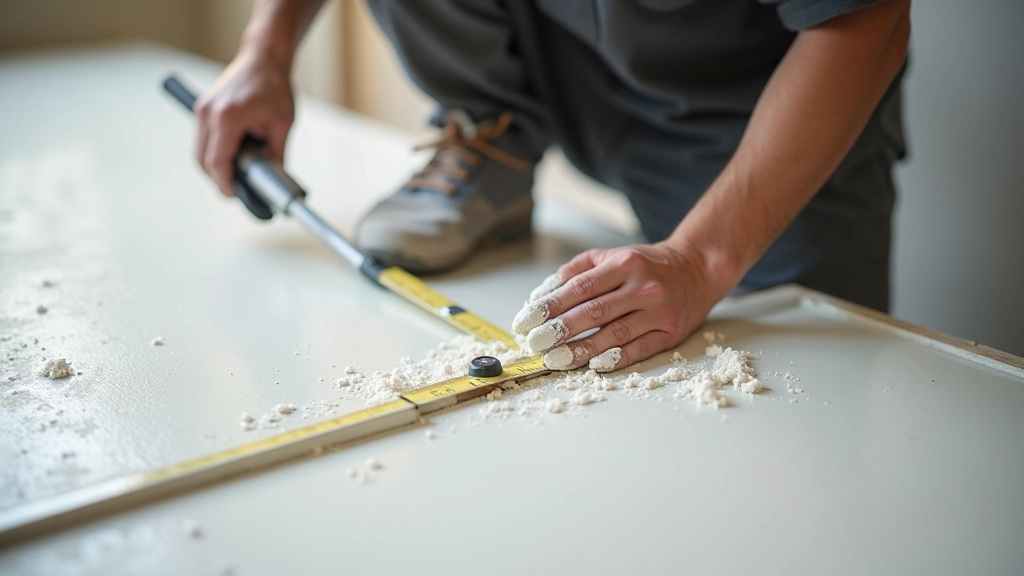
Installation Techniques That Actually Work
1
Prepare the Substrate
Your base must be perfectly flat and stable. We use self-leveling compound to ensure the surface is within 3mm tolerance over 2 meters. Uneven substrates cause tiles to crack and transitions to fail within months.
2
Use the Right Adhesive
Different materials need different adhesives. Tile over stone? You need a flexible, non-staining adhesive. We typically specify epoxy or urethane-based products that accommodate movement without yellowing the stone.
3
Plan Your Grout Lines
In transitions, grout acts as a buffer. A 2-3mm grout line between tile and stone allows for expansion without stress. Wider gaps (5-10mm) become a design feature and accommodate more movement. Narrower lines look refined but demand precision.
4
Seal Appropriately
After installation, seal grout and porous stone (like marble or granite) within 48 hours. In Hong Kong's humidity, water finds its way into unsealed grout and causes discoloration and mold growth. Use a penetrating sealer that doesn't darken the material.
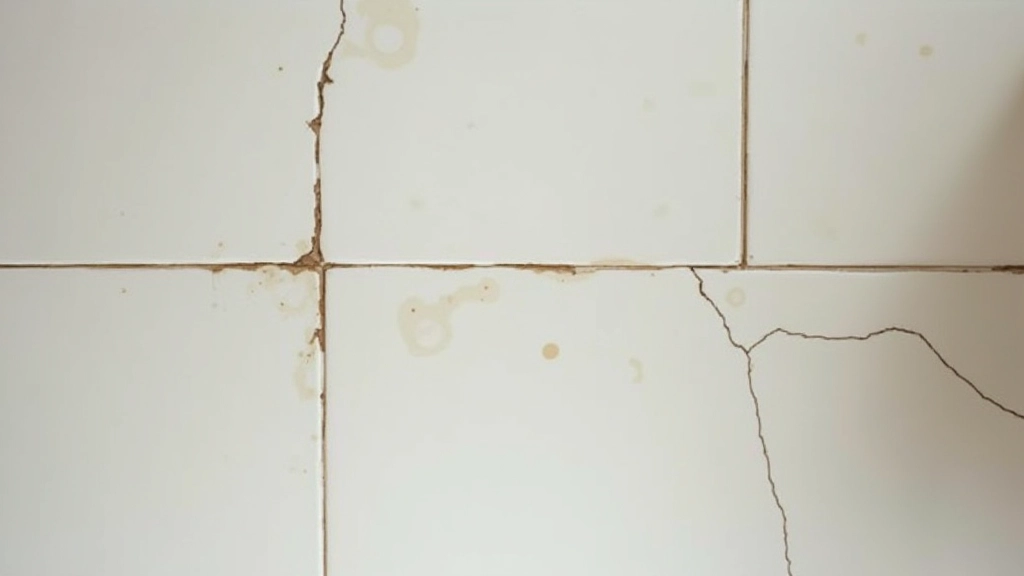
Mistakes We See (And How to Avoid Them)
After 14 years working on renovations across Hong Kong, we've seen the same problems repeatedly. Most aren't about expensive materials — they're about planning details that cost nothing but matter everything.
Ignoring Thermal Movement
We've had clients complain about visible gaps in their backsplash six months after installation. Why? The tile expanded in summer heat and contracted in air conditioning. If the transition doesn't allow for this movement, something's got to give — usually, it's the grout line that cracks.
Mixing Incompatible Grouts
Using rigid epoxy grout between materials with different expansion rates is asking for failure. You need flexible grout in transitions. It costs a bit more, but it's non-negotiable. Standard cement grout will crack under thermal stress.
Skipping the Trim
Trying to save HK$50 per meter on metal trim often costs thousands later when water damage starts creeping behind the backsplash. The trim protects the edge and the substrate. It's not decoration — it's insurance.
Your Practical Checklist for Planning Transitions
When you're meeting with your contractor or designer, use this checklist to make sure the transition details are actually planned:
Material compatibility confirmed: Do your materials expand at similar rates? Ask your supplier.
Edge treatment selected: Metal trim, bullnose, beveled, or eased? Specified in writing with brand/finish.
Grout line width defined: 2-3mm for tight look, 5-10mm for design feature. Know your choice.
Grout type confirmed: Flexible grout for transitions, not standard cement.
Substrate preparation specified: Flat, stable base with self-leveling if needed.
Sealing plan documented: Which materials get sealed? Within 48 hours of installation?

Hard surfaces and their transitions aren't glamorous topics. Nobody walks into a room and thinks, "Wow, what a beautiful grout line." But they notice when transitions fail — when gaps open up, when water damage spreads, when the whole space feels rushed.
The good news? Getting transitions right isn't complicated. It's just deliberate. It's about understanding how materials behave, planning for movement, and using the right techniques. When you do this, your renovation doesn't just look professional — it actually stays that way for years.
If you're planning a renovation in Mong Kok or anywhere in Hong Kong and want to talk through material transitions with someone who's done this hundreds of times, get in touch . We're here to help you make decisions that age well.
Disclaimer: This article provides educational information about material transitions and installation practices based on industry standards and experience. Every renovation project is unique and may have specific requirements based on your building's structure, local conditions, and materials chosen. Always consult with qualified contractors, architects, and material suppliers before beginning any renovation work. Installation techniques, material compatibility, and durability can vary based on specific products and environmental factors. We recommend professional assessment of your space before implementation.
Related Articles